When Considering a Deep Plane Facelift, Shape Matters – Suspension Suture Location and Sequence for Enhanced Facial Shape in the Deep Plane Facelift
March 16, 2026 | Uncategorized
A facelift is not just a facelift. It’s shape surgery. When I’m planning a deep plane facelift, the question I keep coming back to isn’t simply how much tissue I can move — it’s where I anchor it, in what order, and with how much tension.
That’s the thesis behind this post. Five key sutures, consistently applied in a defined sequence — with deliberate minor variations in location and vector — are what allow me to reliably produce a natural, youthful facial shape. Without that intentionality, those same sutures can actively work against you.
While I’m framing this around the deep plane facelift, this approach works equally well for a high SMAS bilamellar lift. And if you’ve been paying close attention to the literature, the conference presentations, and even the social media discussions, I think you’ll notice that those two operations are converging more than most people acknowledge.
Restoring Youth Means Restoring Shape
Aging doesn’t just loosen the face — it changes its shape. Volume redistributes, convexities flatten, and hollows deepen in the wrong places. When I approach a facelift, I’m not thinking about tightening skin. I’m thinking about restoring specific contours to specific regions.
The shape I’m aiming for is a double ogee curve. “Ogee” is an architectural term describing a convexity that flows into a concavity. A double ogee takes that further: convexity → concavity → convexity. In the face, this describes the sweep from the malar mound, down through the infero-retro-submalar hollow, back out to the gonial angle and the body of the mandible. That’s the aesthetic target — and it’s what guides every suture decision I make.
When Sutures Flatten Instead of Enhance
Here’s something I’ve come to appreciate over years of refining this: sutures placed without attention to vector and sequence don’t just fail to create the double ogee — they can actively destroy it.
Place a suture too medially at the malar eminence with an open vector orientation, and you’ll flatten the malar mound instead of projecting it. Make the same error at the gonial angle, and you’ll blunt a feature you were trying to sharpen. This is why I keep returning to this principle:
Enhancement comes from differential tension applied in a purposeful sequence. A flat result comes from uniform tension applied in a random order.
The five-suture technique I use is built around leveraging location, vector, and sequence to enhance the malar mound, the gonial region, and the subtle hollow between them.
A Note on the Neck First
Before getting into the sutures, I want to briefly address the neck — not because it’s the main focus here, but because sequencing matters in the neck just as much as it does in the face.
I use a dual-plane approach through the submental incision: subcutaneous dissection above, subplatysmal below. I make a myotomy at the cervicomental break and perform a platysmaplasty after addressing large submandibular glands, the anterior belly of the digastric, and subplatysmal fat as needed.
Importantly, I always complete the central platysmaplasty first. The vertical elevation of the deep plane tissues is powerful enough that if the lateral lift is done first, gathering the central neck afterward becomes significantly more difficult. Sequence matters here just as it does above.
The Five Key Sutures
I refer to these as SMAS sutures 1 and 2, Platysma sutures 1 and 2, and a fifth safety-securing suture. I’m currently using braided permanent sutures, though I’ve had good results with long-term absorbable monofilament throughout my career as well.
After elevating the skin to expose the SMAS entry points — just lateral to the malar eminence and at the gonial angle — I imbricate the SMAS at both locations, usually incorporating a fan-shaped pedicle of SMAS tissue. The dissection extends from the gonial angle down to the earlobe, elevating along the anterior border of the sternocleidomastoid.
SMAS Suture 1 — Malar Projection
SMAS suture 1 is placed first, at approximately the midpoint of the line between the tragus and the malar eminence — or just below it. Anchored into the deep fascia anteriorly, this suture pushes tissue up onto the malar eminence in a way that a more inferiorly placed suture simply cannot achieve. Location is everything here.
SMAS Suture 2 — Hollow Enhancement
SMAS suture 2 is placed at the corner of the flap or just inferior to it, with a more pronounced vertical oblique vector. Secured into the deep fascia behind the sideburn, it creates tension that produces genuine enhancement of the infero-retro-submalar hollow — particularly in thinner patients where that hollow is most visible and most consequential to the overall shape.
Why Sequence Matters: SMAS 1 Before SMAS 2
SMAS suture 1 must be placed before SMAS suture 2, and the reasoning is mechanical. If I secure the platysma below the gonial angle before placing SMAS 1, it locks the SMAS inferiorly and prevents full malar elevation.
The relationship between SMAS 1 and SMAS 2 matters too. If SMAS 2 is placed before SMAS 1, it places tension along the superior border of the deep plane — creating a clothesline effect that physically prevents the tissue from riding up onto the malar eminence. It limits full elevation because of that early anchoring. The sequence isn’t a preference; it’s mechanically consequential.
Platysma Suture 1 — Gonial Projection
This suture is conceptually similar to Ben Talei’s retroauricular sling, though I find my technique easier to execute. I agree with him that a near-vertical vector from the upper platysmal anchor is essential, and that a medial component — wrapping the platysma inferiorly and behind the gonial angle — is important for enhancing gonial projection.
Rather than going directly to the mastoid fascia, I use a three-step pass: reversing through the incision, traversing the retroauricular crevice, then traveling outward to anchor to the mastoid fascia. I find it quicker and more efficient while achieving the same purpose. I also typically perform a myotomy just above this suture. That myotomy releases tension directly over the gonial angle, preventing blunting and lending itself to enhanced projection in that region. The suture transfers tension behind the gonial angle toward the mastoid.
Platysma Suture 2 — Cervicomental Angle
Platysma suture 2 is a horizontal or horizontally oblique suture placed in the platysma at the level of the cervicomental break. Directing tension horizontally at that location pulls the platysma up into the cervicomental angle and sharpens that definition. Tension along the cervico-mandibular angle enhances that contour as well. The vertical vector of platysma suture 1 works in concert — keeping the tissue between the mandibular border and the cervicomental break point tight against the deeper structures of the neck.
The Fifth Suture — Safety and Smoothing
The fifth suture isn’t really a suspension suture. It’s a smoothing and safety-securing pass — running the SMAS from beginning to end and extending to the platysma. I typically use a braided absorbable or monofilament absorbable here. It tidies everything up and keeps the repair secure.
One More Thing: Bilateral Symmetry
This is something I feel strongly about. SMAS sutures 1 and 2 should be placed with equal tension and — ideally — performed simultaneously on both sides. When I’m securing SMAS suture 1 on the right side, for example, I have someone applying gentle countertraction on the left.
Because of the central platysmaplasty and the contiguous nature of the deep facial tissues — SMAS to platysma and back to SMAS — a tug-of-war effect is entirely possible. You can elevate one side of the face more than the other without realizing it if you’re not actively checking bilateral tension as you work.
Putting It All Together
One of the most important things we aim to create in a facelift is a double ogee curve — with enhancement of the malar eminence and gonial prominence, and a clean, continuous cervicomental to cervico-mandibular break point. The sequence of SMAS sutures 1 and 2, followed by Platysma sutures 1 and 2, facilitates the creation of those contours and shapes. It creates enhancement rather than flattening. The fifth suture holds everything in place.
Enhancement is intentional. Flattening is what happens when it isn’t.
Real Results: Deep Plane Facelift
The images below show a real patient who underwent a deep plane facelift using the suspension suture technique described above. What I find most satisfying in results like this isn’t just the lifting — it’s the shape. The restoration of the malar mound, the definition of the gonial angle, and the clean cervicomental break are exactly what this technique is designed to achieve.
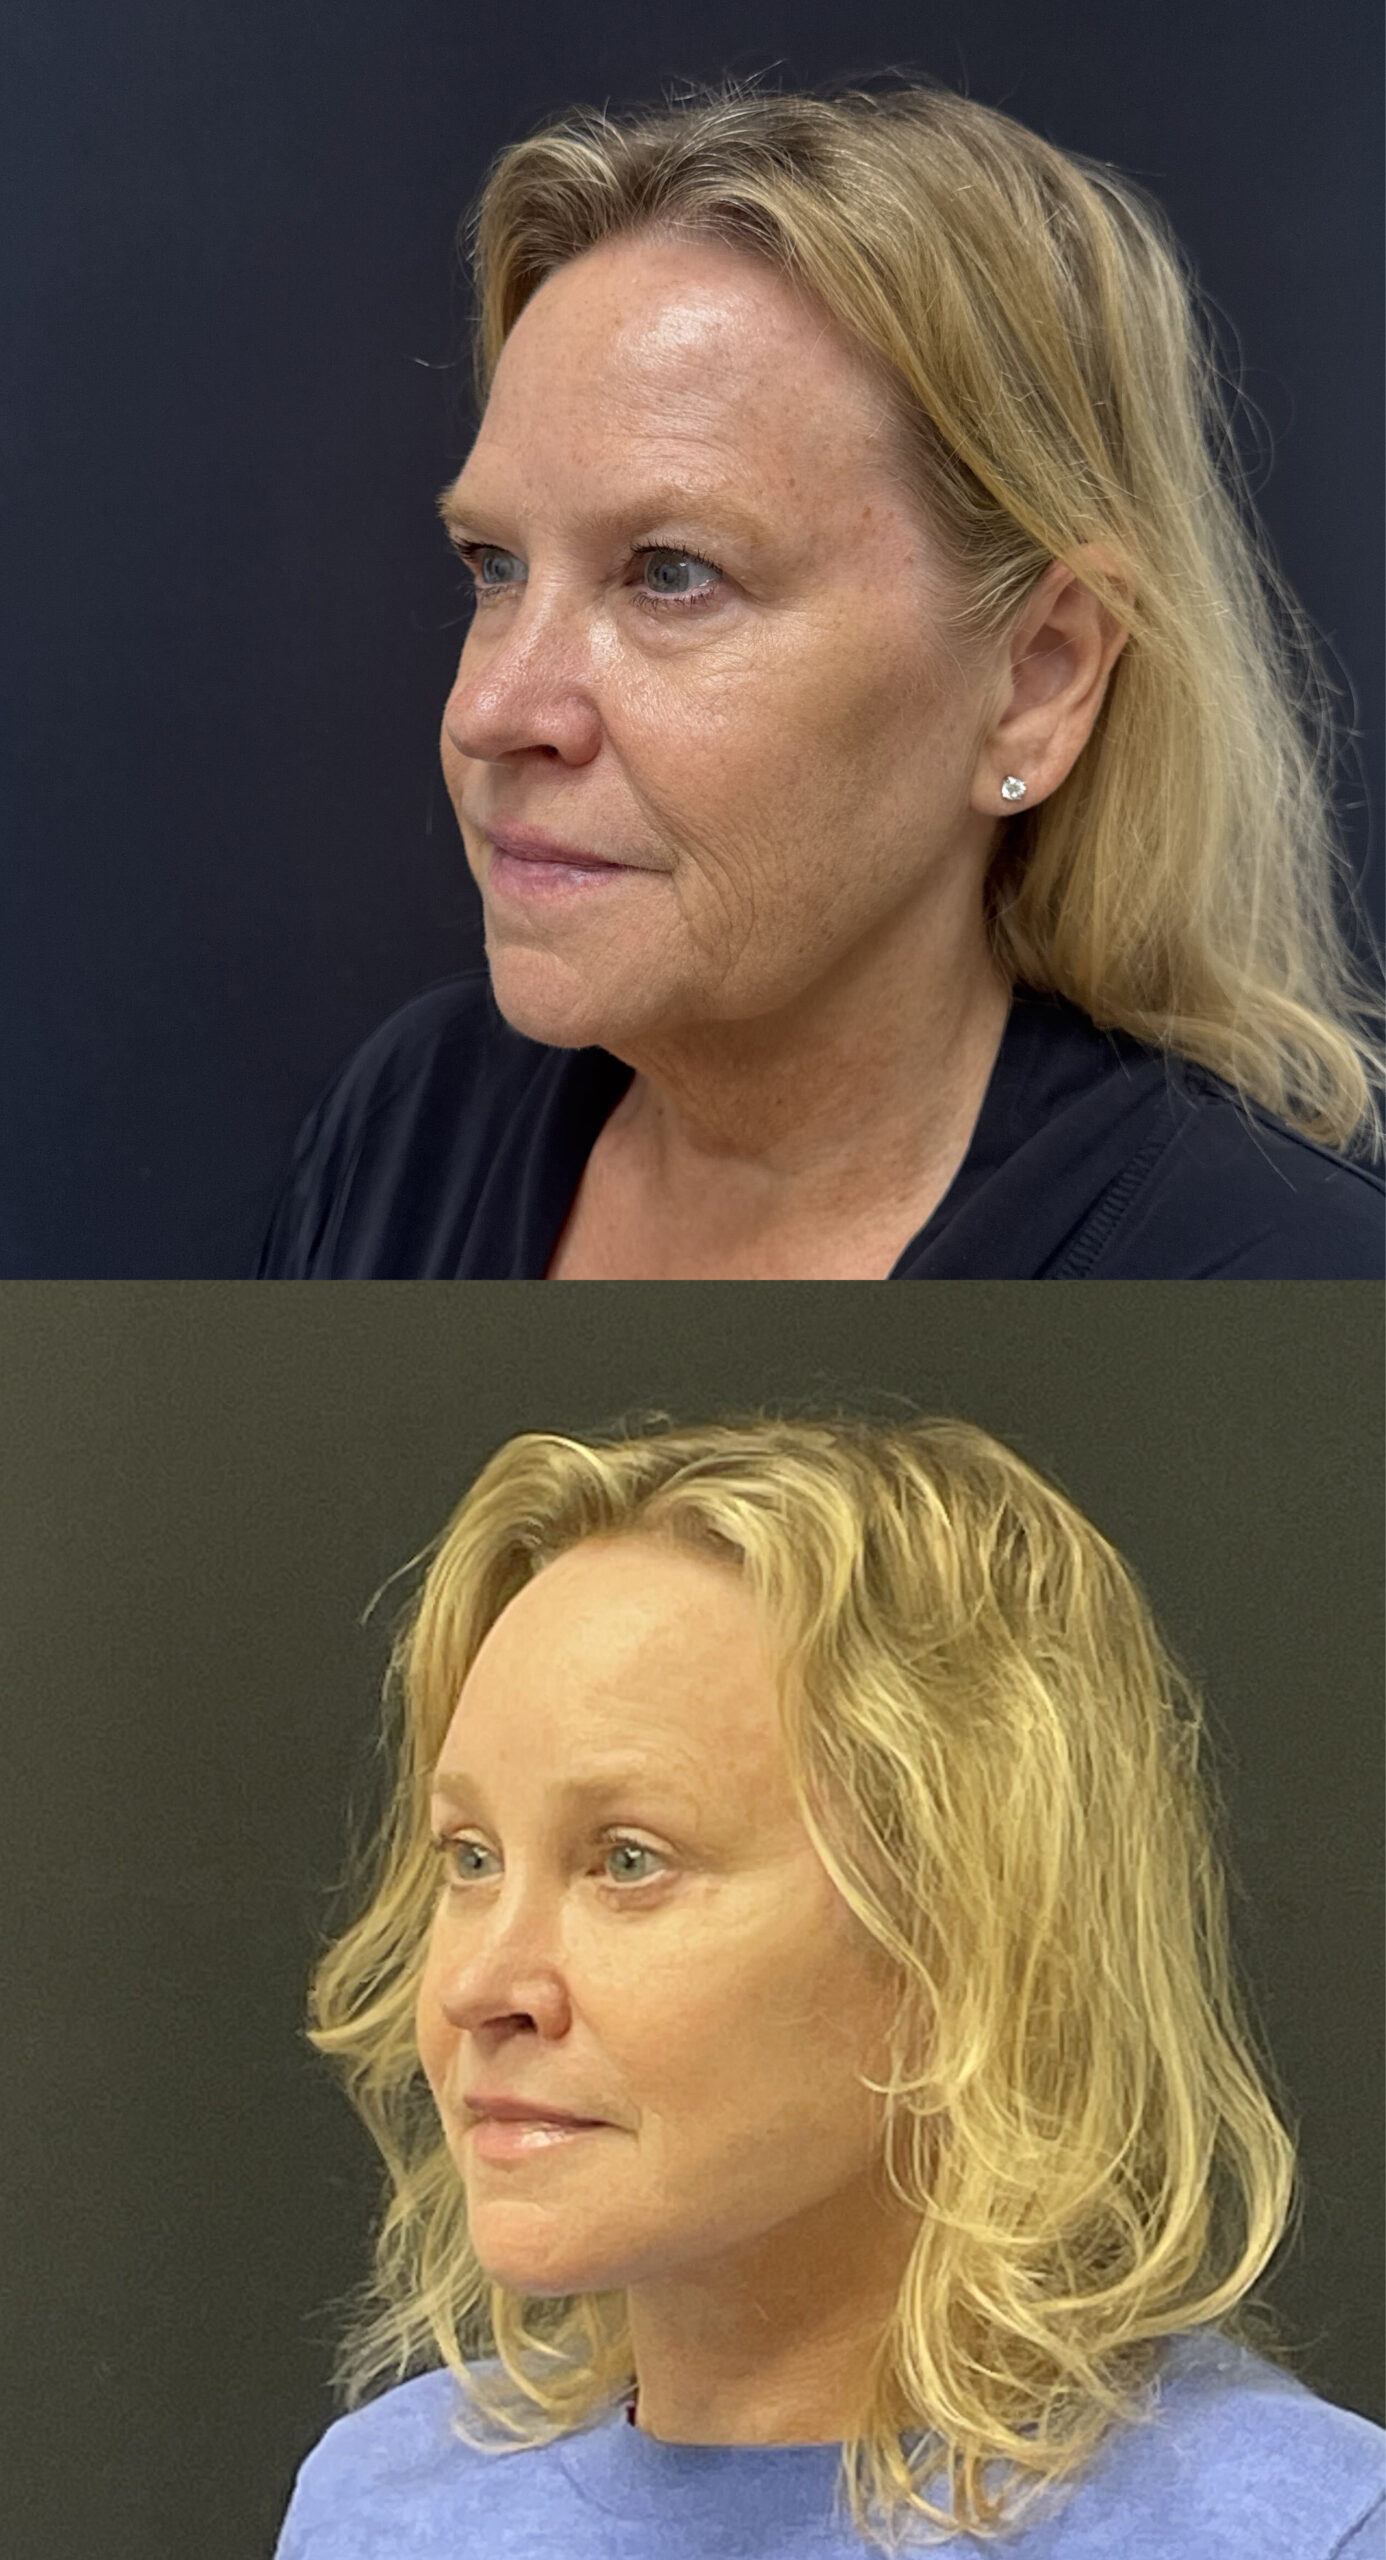
Photography represents an actual patient and is shown with consent. Results are individualized — your outcome will depend on your unique anatomy, skin quality, and goals. The best way to understand what’s possible for you is to schedule a consultation.